Here at ClackTECH, we emphasize on enclosing the heart of your network in a server rack. Choosing the right rack for your application is important, and in many cases, is required for the security of your network equipment. For CPAs, it may be required that your server and on-site backup be stored in a fully enclosed locking rack.
Wall-Mount or Floor-Standing?
This a common question that comes up when designing a network backbone for your business. In many instances, a wall-mount rack will be secure, and the cleanliness of having all the network equipment out of the way in an organized enclosure will make management very easy. We use wall-mount enclosures in most installations, especially for custom homes where the equipment is not very deep. If you’re looking to store a full-sized server such as a Dell PowerEdge in your rack, a wall-mount rack will not be the best choice. Your server will be too deep to properly store in a wall-mount rack. There are some compact servers that will not pose a problem, so we recommend checking the depth of your server before making a decision.
The rule of thumb we use, if the device you’re looking to put in a rack is deeper than 17″, plan on using a floor-standing rack enclosure to give the extra depth needed so you don’t smash cables.

Interested in the rack to the left? We are including a link below to purchase it on Amazon. The great thing is, you can pickup a rack from Tripp Lite in multiple sizes from 9U to 26U. We have found Tripp Lite to make the most secure racks.
What also makes the Tripp Lite our main choice for wall-mount rack enclosures? They easily swing open allowing for easy access to the rear of all your mounted equipment. This is known as a “double-section” enclosure. Unlike cheaper models, the Tripp Lite is sturdy and balanced when swinging open the rack.
As you can see above, we have a lot of equipment installed in the rack without an issue. We have a managed rack-mount UPS, a 32-channel NVR, firewall, switch, patch-panel, a monitor, and the often-forgotten switched power strip. We will be including links to some of the hardware in the rack above to help you choose what to use in your rack configuration.
A floor-standing rack enclosure will not only give you the extra depth, but also additional space to install equipment. We recommend using this option when you are building a data center, or a larger venue utilizing multiple systems in the same rack.
What is a “U”, and how many do I need?
All racks are measured in U, short for rack units. It’s important to plan ahead and make sure to get a rack that will be big enough to hold all planned equipment and future equipment. It doesn’t hurt to leave a few units open for additional air flow or unplanned future equipment. As you can see in the photo above, we have plenty of space for the equipment chosen.
If you’re planning a whole-house audio system, such as Sonos or HeOS, you want to leave at least 1U in between each row of amplifiers for proper air flow. Be sure to calculate this into your measurements when choosing a rack size.
A current project we’re working on at this moment has required we install a 42U rack in the main control room. This rack is the main hub for the entire building. The Internet, firewall, multiple switches, CCTV, and audio equipment are all stored in the rack. With so much equipment, we’re using large UPS systems at the bottom that take up 8U by themselves. Remember to always leave room for power management and protection. Here in Los Angeles, it’s not uncommon for power outages to hit during the summer when everyone is running their air conditioning at full tilt!
An easy way to measure the amount of rack units needed to house all equipment, is to make a spreadsheet where each row is considered a U in a rack. We use this method when making our initial plans for a network. It not only helps determine which size rack is best, but also helps create a blueprint of where each device will go for proper organization.
Download our Excel Server Rack Planner Template Here
Essential Items for a Rack Configuration
The most basic, yet a part very necessary to the organization and functionality of a rack is a switched power strip. You don’t want to be reaching behind devices, pulling out the rack, or hunting for power wires when you need to reboot devices. This can lead to creating a mess of wires over time. Every time a cable has to be unplugged, there’s the potential it won’t be put back the way it was installed. You want to install a rackmount power strip with switches, typically most strips will have 10 switches. You’ll find at least one in all of our installations. However this is convenient, we do not recommend plugging servers to these strips as that can lead to an accident shutting down a server.
Make sure you have enough room to plug in transformers as well. Standard modems and some phone equipment use large power bricks that can cover 2 outlets at once. For this, use these short jumpers to the right.
Backup Power Options
This is the most important supportive piece of hardware for your choice of networking and server equipment. Without the proper backup battery, your rack will power down prematurely in the event of a power outage. We use batteries by APC, Tripp Lite, and CyberPower; these three brands have shown to be very functional and provide the needed backup power. It isn’t always clear if a backup battery pack will fit inside a wall-mount rack, especially larger batteries. But we have found a few that will fit perfectly, and allow all the power necessary to run your network in the event of a power outage.
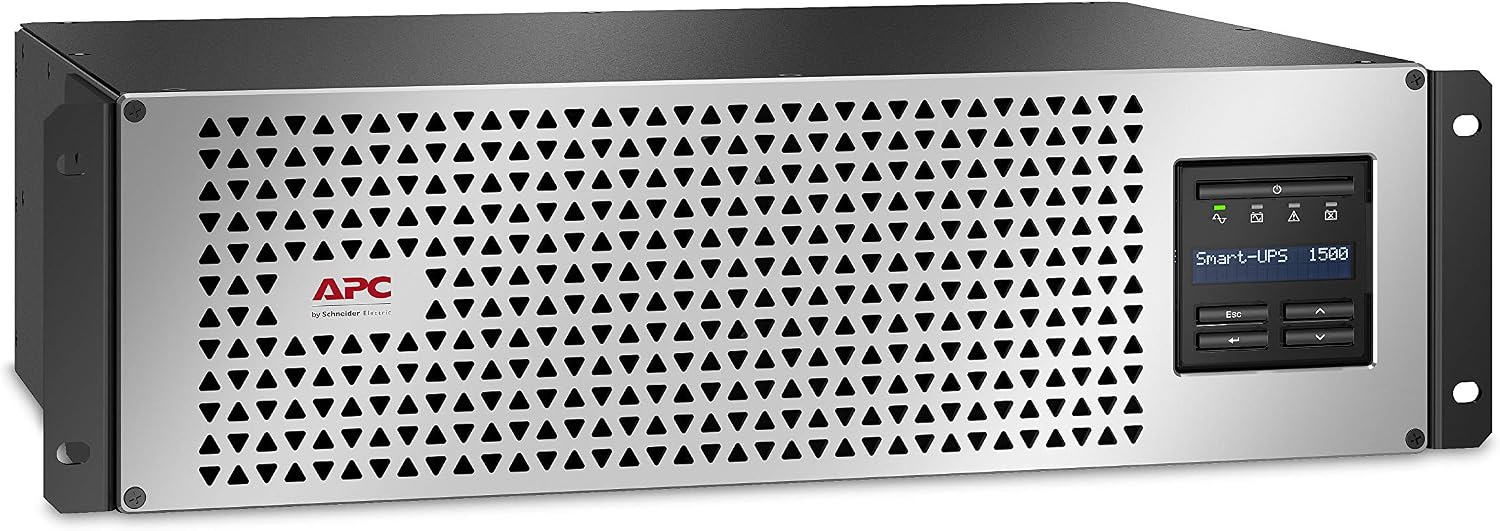
#1 – APC 1500VA Li-Ion UPS
Manufacturer: APC
Model: SMTL1500RM3UC
Load Capacities (VA): 750, 1000, 1500
Input Voltage: 120vac
Rack Spaces: 3U
We’ve used this backup battery in multiple wall-mounted installations, with great results. Not only does it provide enough power to keep an entire rack running after the power has gone out, but it can notify by email when the power has gone out, dropped to a certain level, spiked, and when it comes back online.
Click the image above to purchase this battery backup unit.

Click the image above to purchase this battery backup unit.
#2 – CyberPower Smart App Online
Manufacturer: CyberPower
Model: OL1500RTXL2U
Load Capacities (VA): 750, 1000, 1500, 2000, 2200*, 3000*
Input Voltage: 120vac
Rack Spaces: 2U
This is another battery we have used in multiple instances where we may need the same capacity, but space may be a bit tight. This unit is only 2U, but can handle the same loads thrown at it. It is a bit heavier than the APC, but offers a 2000VA version that still easily fits inside a wall-mount rack enclosure.
*The 2200 & 3000 models are deeper, and thus may not fit in most wall-mount enclosures.
#3 – Tripp Lite Smart 1500VA
Manufacturer: Tripp Lite
Model: SMART1500LCD
Load Capacities (VA): 1200, 1500, 1500 Exp.
Input Voltage: 120vac
Rack Spaces: 2U
This is a great affordable and reliable option for your everyday network equipment power backup. It isn’t fancy, it doesn’t alert you via app, but it will keep your equipment running in the event of a blackout. We use this option mostly in racks running basic switches and small NAS units. The 1500 Exp model allows for an additional battery unit to be attached, therefore expanding the capacity of the battery.
You can find the expansion battery module by clicking here.

Click the image above to purchase this battery backup unit.